Tuesday, 7 May 2013

Monday, 6 May 2013
In what ways does your media product use, develop or challenge forms and conventions of real media products? (Digipak)
I apologise for the delay in sound compared to visuals but I promise you dont miss anything from what I am saying, just "in comparison with....... real life media products"
Sunday, 5 May 2013
How did you use new media technology in the construction, research and planning, and evaluation stages?
My use of various technology was extremely important in the construction, research, and evaluation stages of my media products, and I have had to use a vast range of technology to make my products a success.
Apple iMacs:
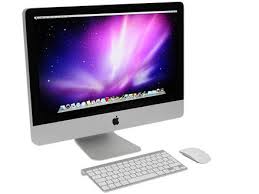 Throughout the year I have been using an Apple iMac for my coursework pieces, and have used this to enhance the creation of my products. I used the iMac for the construction stage, through the use of Final Cut Pro to help make my music video; the evaluation stage through 'Powerpoint' for my presentations, 'Photobooth' for the videos, and 'Final Cut pro' for the editing of various videos of my evaluation pieces. I have also made use of the iMacs for my research and planning towards my constructions, by researching things such as other digipaks, posters, or music videos for me to analyse.
Thanks to my use of the iMac's in my work last year, I had a good understanding of its uses and worked with it very well. There were very few problems with it thanks to me saving my work onto a memory stick as well as the iMac, meaning nothing was lost.
Sony Bloggie
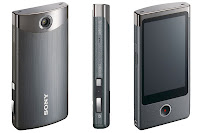 Just like last year, a Sony Bloggie was used for my coursework filming. As cameraman during my coursework piece, this piece of equipment was essential for me to understand and use effectively. Thankfully, I was also cameraman last year with the exact same camera, and so I knew how to function it properly. Unfortunately the only problem I came across was the distortion of some of the shots when zoomed in, however not many of my shots ended up requiring this camera function in the end so no blurriness was seen in my construction of the video piece.
Final Cut Pro:
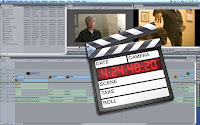 Final Cut Pro was used predominantly in the construction stage of my music video, however it was also used in the evaluation stage. Its features of adding filters and colour correctors have been extremely important to help me successfully create my final video, so that clips flow smoothly from one to another using filters such as 'Fade in Fade out', and to also help my 'Dark vs. Light' notion being displayed through the use of colour corrector, to show some of my clips in the darker, faded light.
Adobe Photoshop:
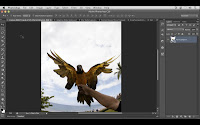 Photoshop was vital for my construction of my poster and digipak panels as it allowed me to develop the pictures I had taken and enhance the overall look of my products. The Adobe Photoshop allowed me to edit things such as lighting and size of my photos, as well as add text and crop pictures onto each other and create background images. Photoshop was new to me this year and so I initially struggled to get the hang of it, and made a lot of mistakes in the run up to my drafts and eventual final products. My favourite part of Photoshop was the 'magnetic tool' which allowed me to crop around an image and cut it out from the picture or move the cropped image from one photo to another. I used this when creating my poster in order to add the image of the artist with the background image of the piano.

Powerpoint and Prezi
 These were used through many of my blog works, and the research and evaluation parts. They allowed me to showcase my work on my blog through different forms of media than the standard blog post, and have hopefully made my blog more exciting for you to read?!
Nikon SLR 500:
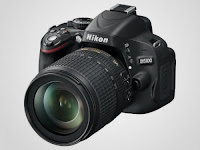 I used this piece of technology for the pictures of my poster and digipak, as the enhanced picture quality helped me to develop a greater photo type and a better quality of product.
Apple iMacs:
Throughout the year I have been using an Apple iMac for my coursework pieces, and have used this to enhance the creation of my products. I used the iMac for the construction stage, through the use of Final Cut Pro to help make my music video; the evaluation stage through 'Powerpoint' for my presentations, 'Photobooth' for the videos, and 'Final Cut pro' for the editing of various videos of my evaluation pieces. I have also made use of the iMacs for my research and planning towards my constructions, by researching things such as other digipaks, posters, or music videos for me to analyse.Thanks to my use of the iMac's in my work last year, I had a good understanding of its uses and worked with it very well. There were very few problems with it thanks to me saving my work onto a memory stick as well as the iMac, meaning nothing was lost.
Sony Bloggie
 Just like last year, a Sony Bloggie was used for my coursework filming. As cameraman during my coursework piece, this piece of equipment was essential for me to understand and use effectively. Thankfully, I was also cameraman last year with the exact same camera, and so I knew how to function it properly. Unfortunately the only problem I came across was the distortion of some of the shots when zoomed in, however not many of my shots ended up requiring this camera function in the end so no blurriness was seen in my construction of the video piece.
Final Cut Pro:
 Final Cut Pro was used predominantly in the construction stage of my music video, however it was also used in the evaluation stage. Its features of adding filters and colour correctors have been extremely important to help me successfully create my final video, so that clips flow smoothly from one to another using filters such as 'Fade in Fade out', and to also help my 'Dark vs. Light' notion being displayed through the use of colour corrector, to show some of my clips in the darker, faded light.
Adobe Photoshop:
 Photoshop was vital for my construction of my poster and digipak panels as it allowed me to develop the pictures I had taken and enhance the overall look of my products. The Adobe Photoshop allowed me to edit things such as lighting and size of my photos, as well as add text and crop pictures onto each other and create background images. Photoshop was new to me this year and so I initially struggled to get the hang of it, and made a lot of mistakes in the run up to my drafts and eventual final products. My favourite part of Photoshop was the 'magnetic tool' which allowed me to crop around an image and cut it out from the picture or move the cropped image from one photo to another. I used this when creating my poster in order to add the image of the artist with the background image of the piano.
Powerpoint and Prezi
 These were used through many of my blog works, and the research and evaluation parts. They allowed me to showcase my work on my blog through different forms of media than the standard blog post, and have hopefully made my blog more exciting for you to read?!
Nikon SLR 500:
 I used this piece of technology for the pictures of my poster and digipak, as the enhanced picture quality helped me to develop a greater photo type and a better quality of product.
Saturday, 4 May 2013
Wednesday, 1 May 2013
Monday, 29 April 2013
Final Poster; and analysis
Here is my final draft for my album poster advertisement:


When creating this I aimed to make sure that the band name and album name really stood out, and so I felt that the white colouring of the writing was highlighted in contrast with the backgriound images.
I have used the same image for my poster as I have the image on my digipak front cover, and in doing so I hope I create a link between the two. I feel that this will create a noticeable image that can be linked with the album, making the piano image recogniseable to the viewers.
Also, I have included a picture of Ben, the artist, in order to create a relationship between the band and its audience, as the more they see the bands personell, the more recogniseable and high-profile the band becomes.
I have included the release date in bold in the middle of the poster in order to increase its profile. The more that the date is noticed, the more it is stuck in the viewers' mind, much like the pictures of the piano and artist.
Sunday, 28 April 2013
Final digipak panels
These are my final 6 panels of my Digipak, 'From rags to riches':
 |
| 1. Front Cover |
 |
| 2. Inside left |
 |
| 3. Inside centre; CD holder |
 |
| 4. Inside right |
 |
| 5. Outside centre |
 |
| 6. Back cover |
Friday, 26 April 2013
Wednesday, 17 April 2013
Poster draft image
Here is the background image I will be using for my poster:
 This is obviously without the extra details.
The reason I will be using this image is because it is the same image I will be using for the front cover of my digipak, and so in doing so it will help develop a relationship between the audience and the album due to the recurring image. This will mean that the audience will associate this image with our band and the album itself, making it evident what the product is we are promoting.
When making my poster for final I will include:
Band name,
Album name,
Release date,
Producttion companies,
Somgs included in the album, and,
Where it can be purchased.

The reason I will be using this image is because it is the same image I will be using for the front cover of my digipak, and so in doing so it will help develop a relationship between the audience and the album due to the recurring image. This will mean that the audience will associate this image with our band and the album itself, making it evident what the product is we are promoting.
When making my poster for final I will include:
Band name,
Album name,
Release date,
Producttion companies,
Somgs included in the album, and,
Where it can be purchased.
Monday, 15 April 2013
Poster content
After some research and analysing of other posters, below is the general content I believe should be included in my music poster;
1. Artist name
2. Band name
3. Release date
4. Album name
5. Songs in the album
6. Production companies
7. Places or how it can be purchased
Using all of this in the creation of my poster will definitely enhance my product and tick all the requirements of a music poster.
1. Artist name
2. Band name
3. Release date
4. Album name
5. Songs in the album
6. Production companies
7. Places or how it can be purchased
Using all of this in the creation of my poster will definitely enhance my product and tick all the requirements of a music poster.
Monday, 25 March 2013
Tuesday, 19 March 2013
New Digipak front cover
I have decided to change the look of my front cover for my digipak, mainly because I am no longer fond of the previous one. My new cover will be this;

I feel that this picture has a much better look to it, and is more fitting to the music genre of our band. The font style and colours are also more fitting to the picture, and stand out well in contrast to the colours in the background. There is still a link between our music video within this picture, as we use this exact piano in the making of our video, and this picture also fits in well with our song choice due to the piano tune heard in the song.
I do still need to add on and edit extra panels of course, which I will show on my blog when done.
Saturday, 16 March 2013
Wednesday, 13 March 2013
Thursday, 7 March 2013
Final filming schedule; 8th March
This is our final piece of film, as we need film for the artist.
It will be in our school hall, as we need to film footage of the plaque as a symbol for the 'Hall of Fame' when our athlete wins the race. This is the same location of the footage we've had for all of that involving the artist.
The artist himself may not actually be in the footage, depending on what looks more effective, but the main focus is on the plaque within the hall; the plaque we will film has been used in our previous shots, with the artist staring up at it as somewhat of an inspiration. This final piece of footage will highlight how he has been striving to reach the 'Hall of Fame', and how his hard-work helps him achieve hgis goal.
I will be cameraman, and will take still footage of the plaque, before we edit the name 'BEN AMATRUDA' (name of the athlete) onto it under the names already up there, to signify the achievement the athlete has accomplished.
It will be in our school hall, as we need to film footage of the plaque as a symbol for the 'Hall of Fame' when our athlete wins the race. This is the same location of the footage we've had for all of that involving the artist.
The artist himself may not actually be in the footage, depending on what looks more effective, but the main focus is on the plaque within the hall; the plaque we will film has been used in our previous shots, with the artist staring up at it as somewhat of an inspiration. This final piece of footage will highlight how he has been striving to reach the 'Hall of Fame', and how his hard-work helps him achieve hgis goal.
I will be cameraman, and will take still footage of the plaque, before we edit the name 'BEN AMATRUDA' (name of the athlete) onto it under the names already up there, to signify the achievement the athlete has accomplished.
Subscribe to:
Posts (Atom)